All Posts By

Pavan

3D Printed Drone Parts in India Materials, Cost & Design

3D Printed Drone Parts in India

Quick answer

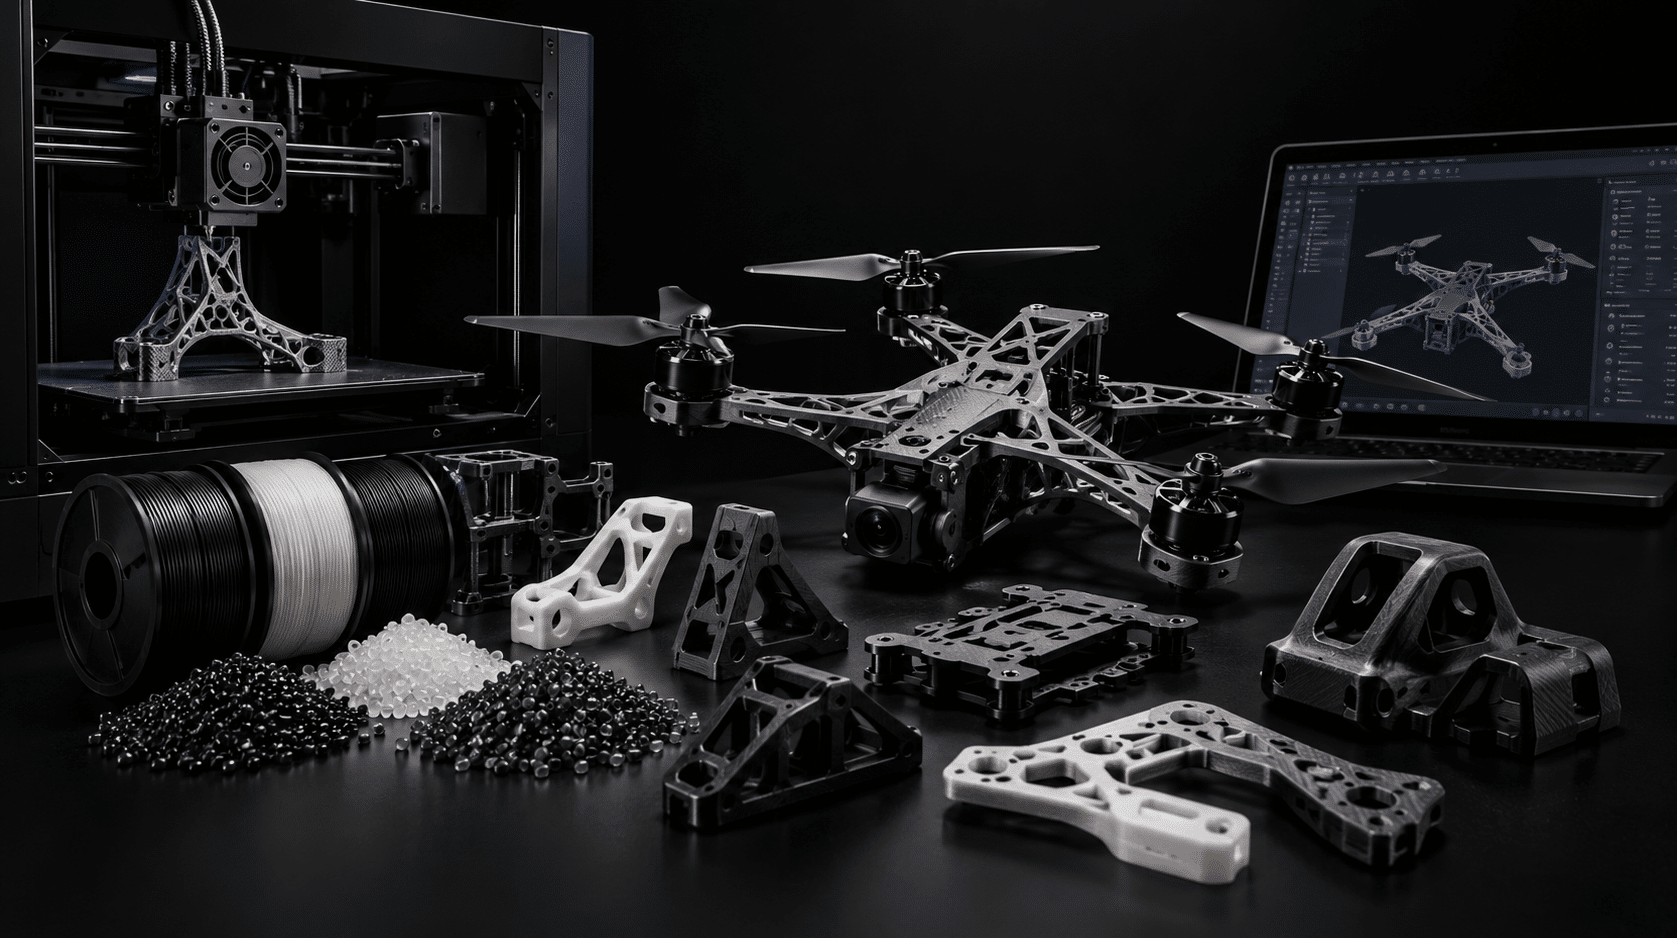
3D printed drone parts are custom UAV components — arms, motor and camera mounts, canopies, landing gear, battery housings and payload enclosures — made by additive manufacturing instead of moulding or machining. In India, nylon PA12 (SLS/MJF) and carbon-fibre nylon are the best all-round materials for strength-to-weight. Indicative 2026 prices range from about ₹300 for a small mount to ₹12,000 for a large canopy, with typical lead times of 2–5 working days.

Key takeaways

  • Use PA12 nylon (SLS/MJF) for most flight parts, carbon-fibre nylon for stiff arms, and TPU for dampers and landing feet.
  • Avoid PLA on flight parts — it softens at around 55–60°C, a temperature a drone can reach sitting in Indian summer sun.
  • Keep carbon-fibre-filled parts away from GPS and antennas — carbon is conductive and can weaken signal.
  • 3D printing is fastest for 1–1,000 parts; beyond that, injection molding usually becomes cheaper per part.
  • Main frame plates on racing drones are still best in CNC-cut carbon fibre — 3D printing complements them rather than replacing them.

India’s drone industry has changed quickly. The government liberalised the Drone Rules in August 2021, launched a Production Linked Incentive (PLI) scheme for drones and drone components in September 2021, and banned imports of fully built drones from 9 February 2022 — while keeping imports of components open. The result: Indian companies now design their own airframes, and they need custom parts fast. The civil aviation ministry noted in 2022 that 50–60% of high-value drone components were still imported, which is exactly the gap local manufacturing is filling.

That is where 3D printing fits. Instead of waiting weeks for a mould, a drone team can test a new arm, mount or canopy in days, fly it, and change the design the same week. This guide covers which parts to print, the best materials, real cost ranges in India and the design rules that stop parts failing in the air.

Which Drone Parts Can Be 3D Printed?

Most non-electronic structural and housing parts on a small or mid-size drone can be 3D printed. The table below shows the most common ones and the material we typically recommend.

Drone partRecommended materialProcessWhy 3D print it
Arms / boomsCarbon-fibre nylon, PA12FDM (CF), SLS / MJFChange arm length and motor spacing between test flights
Motor mountsGlass-filled PA12, CF-nylon; aluminium for heavy-liftSLS, FDM, metal (DMLS)Custom bolt patterns and built-in vibration damping
Camera & gimbal mountsPA12 + TPU dampersSLS + FDMIsolates vibration for cleaner footage and mapping data
GPS & antenna mountsPETG, PA12 (no carbon)FDM, SLSLightweight and RF-transparent
Canopy / body shellPA12, ASASLS / MJF, FDMComplex aerodynamic shapes with no tooling cost
Landing gear & skidsTPU, PA12FDM, SLSAbsorbs hard landings instead of cracking
Battery trays & housingsPA12, PC-ABSSLS, FDMExact fit around custom battery packs
Payload & sensor podsPA12, ASA, PETGSLS, FDMCustom housings for sprayers, LiDAR and multispectral sensors
Propeller guards & ductsPA12, PETGSLS, FDMLightweight protection for indoor and inspection drones

← Swipe to see the full table on mobile

What should not be 3D printed

  • Flight propellers — print them for fit checks only. Balance and fatigue requirements make moulded or carbon props the safe choice.
  • Main frame plates on racing or FPV drones — CNC-cut carbon fibre plate is still stiffer and lighter for flat parts.
  • Parts right next to hot motors or ESCs in standard plastics — use glass-filled nylon or aluminium instead.

Best Materials for 3D Printed Drone Parts

For drones, weight is everything, so density matters as much as strength. Lower density means a lighter part for the same volume and more flight time.

MaterialDensity (approx. g/cm³)Strength-to-weightImpactHeatBest for
PA12 nylon (SLS/MJF)1.01HighHighGoodArms, canopies, mounts, enclosures — the all-rounder
Glass-filled PA121.2–1.3High (stiff)MediumVery goodMotor mounts, parts near heat
Carbon-fibre nylon (FDM)1.1–1.2Very high (stiff)MediumVery goodArms and frames (not near antennas)
ASA1.07MediumMediumGood + UV stableOutdoor shells, agri-drone covers
PETG1.27MediumMediumModerateMounts, covers, early prototypes
TPU (95A)1.2FlexibleVery highModerateDampers, bumpers, landing feet
Engineering resin (SLA)1.1–1.2MediumLow–mediumVariesFit-check prototypes, fine details
Aluminium AlSi10Mg (DMLS)2.67HighHighExcellentHeavy-lift motor mounts, heat sinks

← Swipe to see the full table on mobile

Our default recommendation: start with PA12 for almost everything, move arms to carbon-fibre nylon if you need more stiffness, and use TPU wherever a part should flex rather than break. For heavy-lift motor mounts, see our metal 3D printing guide.

Why not PLA?

PLA is cheap and easy to print, but it softens at around 55–60°C. A drone left in a car or on an open field in an Indian summer can pass that, and arms or mounts will sag or warp. Use PLA only for display models and early shape checks.

FDM vs SLS/MJF vs SLA: Which Process Suits Drone Parts?

ProcessStrengthSurface finishTypical lead timeBest stage
FDMStrong along layers, weaker between themVisible layer lines1–3 daysEarly prototypes, CF-nylon arms, jigs
SLS / MJFNear-uniform in all directions; no supports neededSlightly grainy, can be dyed black2–4 daysFunctional parts and low-volume production
SLAPrecise but more brittleVery smooth1–3 daysFit checks, aerodynamic models

← Swipe to see the full table on mobile

For a deeper comparison, read FDM vs SLA vs SLS: which 3D printing process is right for your part.

How Much Do 3D Printed Drone Parts Cost in India?

Cost depends on part volume, material, process, finish and quantity. The ranges below are indicative 2026 prices per piece in India, excluding GST, design and shipping.

PartMaterial / processTypical weightPrice per piece (1–5 pcs)Price per piece (50+ pcs)
GPS / antenna mountPETG, FDM10–25 g₹300–₹800₹150–₹400
Camera mount with TPU dampersPA12 SLS + TPU20–40 g₹800–₹2,000₹400–₹1,000
Drone arm (small multirotor)CF-nylon FDM or PA12 SLS40–100 g₹1,200–₹3,500₹600–₹1,800
Landing gear set (4 legs)TPU or PA1260–150 g₹1,000–₹3,000₹500–₹1,500
Battery housing / trayPA12 SLS80–200 g₹2,000–₹6,000₹1,000–₹3,000
Canopy / body shellPA12 SLS / MJF150–400 g₹4,000–₹12,000₹2,000–₹6,000
Payload / sensor enclosurePA12 or ASA150–500 g₹3,500–₹12,000₹1,800–₹6,000
Heavy-lift motor mountAluminium AlSi10Mg, DMLS30–80 g₹5,000–₹15,000Quote-based

← Swipe to see the full table on mobile

Need a model made first? CAD design is charged separately — see 3D CAD design services. For the full rate card by material, read our cost of 3D printing in India guide.

5 ways to reduce the cost of drone parts

  1. Batch parts together — several arms and mounts in one SLS build share the machine cost.
  2. Hollow or rib the design — material you remove is money and flight time saved.
  3. Combine parts — one printed part can replace a bracket, spacer and screws.
  4. Pick the right process — use FDM for early tests and move to SLS only when the design is close to final.
  5. Order a spare set — a second set in the same build costs far less than a rush reprint after a crash.

Design Tips for Strong, Light 3D Printed Drone Parts

  1. Orient FDM arms lengthwise so layers run along the arm and carry the bending load.
  2. Keep structural walls 1.5–2.5 mm thick in PA12; walls under 1 mm are fragile.
  3. Use heat-set brass inserts instead of cutting threads into plastic — they survive repeated assembly.
  4. Add fillets where arms meet the body — sharp inside corners are where cracks start.
  5. Keep carbon-fibre materials away from GPS, compass and radio antennas to protect signal quality.
  6. Isolate vibration with TPU dampers under cameras and flight controllers.
  7. Allow 0.3–0.5 mm clearance for fits in SLS parts; typical SLS tolerance is about ±0.3 mm.
  8. Design for heat and UV — choose ASA or dyed PA12 for drones that work outdoors all day.
  9. Test, fly, iterate — print, flight-test and revise; 3D printing makes a new version cheap.

If your drone carries electronics in a sealed housing, our custom enclosure 3D printing page covers sealing, mounting bosses and cable routing.

From Prototype to Production: Scaling Drone Parts

The best manufacturing route changes as your order quantity grows. Here is how drone makers typically scale:

QuantityBest routeTypical lead time
1–10 partsFDM or SLS 3D printing2–5 days
10–50 identical partsSLS batch or vacuum casting1–2 weeks
50–1,000 partsSLS / MJF production batches1–3 weeks
1,000+ partsInjection molding (aluminium or steel tool)2–8 weeks including tooling

← Swipe to see the full table on mobile

Learn more about vacuum casting, compare 3D printing vs injection molding, or see our injection mold tool-making services for high volumes.

Why Drone Makers Choose Precious3D

Precious3D is a Chennai-based manufacturing partner for drone manufacturers across India, including teams in Bangalore and Hyderabad. We keep every stage of drone part production under one roof:

  • CAD and design-for-manufacturing support — we flag weak points before printing.
  • FDM, SLA, SLS and metal 3D printing — so we recommend the right process, not the one machine we own.
  • Vacuum casting and injection molding — one partner from first prototype to production.
  • NDA-backed confidentiality — your airframe design stays yours.

Get a quote for your drone parts

Send your STEP or STL files, quantity and preferred material, and we’ll reply with a price and lead time within [24–48 hours].

Request a Quote Call +91 86100 39566

Frequently Asked Questions

Can a drone frame be 3D printed?

Yes. Small and mid-size drone frames, arms, canopies and mounts are routinely 3D printed in PA12 nylon or carbon-fibre nylon. For racing drones, flat main plates are still usually CNC-cut carbon fibre, with 3D printed arms, mounts and covers added around them.

What is the best material for 3D printed drone parts?

PA12 nylon printed by SLS or MJF is the best all-round choice because it is light (about 1.01 g/cm³), tough and heat resistant. Carbon-fibre nylon suits stiff arms, TPU suits dampers and landing feet, and aluminium suits heavy-lift motor mounts.

How much does it cost to 3D print a drone arm in India?

A small multirotor drone arm typically costs ₹1,200–₹3,500 per piece for 1–5 pieces in carbon-fibre nylon or PA12, and around ₹600–₹1,800 per piece for 50 or more. Final price depends on size, material, finish and quantity.

Is PLA good for drone parts?

No, not for flight parts. PLA softens at around 55–60°C, which a drone can reach in direct Indian summer sun or inside a parked vehicle. Use PLA only for display models and early shape checks, and PA12, ASA or PETG for anything that flies.

Are 3D printed drone parts strong enough for commercial or agricultural drones?

Yes, when the right material and design are used. SLS-printed PA12 parts are used in functional and end-use drone components. Adding fillets, correct wall thickness and metal inserts, and flight-testing each design revision, gives reliable parts for commercial use.

Can I 3D print drone propellers?

Printed propellers are fine for fit checks and wind-tunnel models, but not recommended for flight. Propellers need precise balance and high fatigue resistance, so moulded plastic or carbon-fibre propellers are the safer choice.

Does carbon fibre filament affect GPS signal?

It can. Carbon fibre is electrically conductive and can weaken radio signals, so avoid carbon-filled materials for GPS, compass and antenna mounts. Use PETG or plain PA12 for those parts instead.

How long does it take to get drone parts 3D printed in India?

Most 3D printed drone parts are ready in 2–5 working days from an approved file. Batches of 50–1,000 parts usually take 1–3 weeks, and injection-moulded parts take 2–8 weeks including tooling.

What file format do I need to send?

STEP files are preferred because they keep exact geometry for design review. STL files are also accepted. If you only have a sketch or a broken part, a CAD designer can create a print-ready model for you.

Sources

  • Ministry of Civil Aviation — PLI scheme for drones and drone components
  • DGFT notification prohibiting import of drones in CBU/CKD/SKD form from 9 February 2022, as reported by Deccan Herald
  • Ministry of Civil Aviation statement (6 July 2022) on 50–60% of high-value drone components being imported

Low-Volume Manufacturing in India: 3D Printing vs Vacuum Casting vs Soft Tooling

Low-Volume Manufacturing in India 3D Printing vs Vacuum Casting vs Soft Tooling

Quick answer

Low-volume manufacturing means producing roughly 50 to 5,000 parts — more than a prototype run, fewer than mass production. In India there are three main routes: production 3D printing (SLS/MJF) for up to a few hundred parts with no tooling, vacuum casting for 10–100 identical parts with a near-moulded finish, and soft-tooling injection molding (aluminium moulds) for about 500–10,000 parts at the lowest cost per part. The right choice depends mainly on quantity, material and how final your design is.

Your prototype works. Customers want it. But you need 200 units, not 20,000 — and nobody wants to spend lakhs on a steel mould for a design that might still change. This is the gap low-volume manufacturing fills.

The good news: you have more options in India than ever. The hard part is choosing between them, because each one wins at a different quantity. This guide compares all three routes side by side, with a worked cost example so you can see where each one becomes the cheapest.

Key takeaways

  • Under ~50 parts: 3D printing or vacuum casting is almost always cheaper than any mould.
  • ~50–300 parts: SLS 3D printing and vacuum casting compete; choose on material and finish.
  • ~300–5,000 parts: soft-tooling injection molding usually gives the lowest cost per part.
  • If the design may still change, delay tooling — 3D printing and vacuum casting cost almost nothing to revise.
  • Many product launches use a hybrid: ship 3D printed or cast parts now while the mould is being made.

What Is Low-Volume Manufacturing?

Low-volume manufacturing is the production of end-use parts in quantities too large for one-off prototyping but too small to justify full production tooling — typically 50 to 5,000 units. It is also called bridge production, because it bridges the gap between a validated prototype and mass production.

It is used for pilot batches, market tests, first customer shipments, spare parts, custom or seasonal products, and B2B equipment that simply never sells in huge numbers. If you are still at the single-part stage, start with our guide to rapid prototyping services in India.

Option 1: Production 3D Printing (SLS / MJF)

Industrial powder-bed printers such as SLS and MJF build dozens of parts at once in tough nylon (PA12), with no tooling and no support marks. Every part can even be different.

  • Best for: 1–300 parts, complex shapes, designs still changing, mixed parts in one order.
  • Setup cost: none.
  • Lead time: 2–4 days for small batches; 1–3 weeks for a few hundred parts.
  • Limitations: cost per part barely falls with volume; material choice is mostly nylons and TPU; surface is slightly grainy (can be dyed, smoothed or painted).

Not sure SLS is the right print process? Compare it in our FDM vs SLA vs SLS guide.

Option 2: Vacuum Casting

A high-quality master part (usually 3D printed) is used to make a silicone mould. Polyurethane resin is then poured into the mould under vacuum to produce copies with a finish close to injection-moulded parts.

  • Best for: 10–100 identical parts that must look and feel like production parts.
  • Setup cost: a master and silicone mould — relatively low. Each mould typically gives around 20 good copies before it needs replacing.
  • Lead time: 7–15 days.
  • Materials: PU resins that simulate ABS, PP, PC, clear parts and rubber in different hardness levels; colours can be matched.
  • Limitations: moulds wear out, so cost per part stays flat as quantity grows; resins imitate — but are not — the final production plastic.

See how it works step by step in our guide to the vacuum casting process.

Option 3: Soft-Tooling Injection Molding

Soft tooling uses an aluminium or pre-hardened steel mould instead of a fully hardened production tool. It is faster and cheaper to make, and it moulds parts in the real production plastic — ABS, PP, PC, nylon and more.

  • Best for: roughly 500–10,000 parts, stable designs, parts that must use the final material.
  • Setup cost: the highest of the three — but typically well below a hardened multi-cavity steel tool.
  • Lead time: about 2–4 weeks for the tool, then parts in days.
  • Limitations: design changes after tooling are slow and costly; tool life is lower than hardened steel.

For full tooling and per-part pricing, read our injection molding cost in India guide and low-volume vs high-volume injection molding.

3D Printing vs Vacuum Casting vs Soft Tooling: Side-by-Side

FactorProduction 3D printing (SLS/MJF)Vacuum castingSoft-tooling injection molding
Sweet-spot quantity1–30010–100500–10,000
Upfront / tooling costNoneLow (master + silicone moulds)Highest (aluminium or P20 tool)
Cost per part as volume risesAlmost flatFlat (moulds wear out)Falls sharply
Lead time to first parts2–4 days7–15 days2–4 weeks
MaterialsPA12, glass-filled PA12, TPUPU resins simulating ABS, PP, PC, rubber, clearReal production plastics (ABS, PP, PC, nylon…)
Surface finishSlightly grainy; dye, smooth or paintExcellent — copies the masterProduction-grade, textures possible
Design changesFree — edit the fileNew master and mouldTool modification — slow and costly
Best whenDesign still evolving or parts are complexParts must look production-ready in small numbersDesign is frozen and volumes are rising

← Swipe to see the full table on mobile

Cost by Quantity: A Worked Example

To show where each route wins, here is an illustrative example: a small electronics enclosure half, about 100 × 60 × 30 mm and 40 g. Figures are indicative 2026 per-part costs in India, including the tooling or mould cost spread across the batch, excluding GST, finishing and shipping.

QuantitySLS 3D printing (PA12)Vacuum casting (PU)Soft-tool injection molding (ABS)Usually cheapest
50 parts₹800–₹1,200₹1,000–₹1,600₹2,400–₹4,1003D printing or vacuum casting
200 parts₹700–₹1,000₹900–₹1,450₹650–₹1,100Close — choose on material & finish
1,000 parts₹600–₹900Not practical₹160–₹280Soft tooling
5,000 parts₹550–₹850Not practical₹65–₹120Soft tooling (or steel tool beyond this)

← Swipe to see the full table on mobile

How to read this: soft tooling starts expensive because the mould cost is shared across only a few parts, then drops fast. 3D printing and vacuum casting stay roughly flat. For this part, the lines cross at around 200–300 units. A larger or more complex part pushes the crossover higher; a small, simple part pushes it lower.

Want a deeper side-by-side of the two ends of the scale? Read 3D printing vs injection molding. For 3D printing rates by material, see our cost of 3D printing in India guide.

Which Route Fits Your Product?

Product / industryTypical first batchRecommended route
IoT and electronics enclosures50–500 unitsSLS for the pilot, then soft tooling once the PCB and design are frozen
Drone arms, mounts and canopies20–300 setsSLS / MJF nylon — see 3D printed drone parts
Automotive trims, brackets and covers100–2,000Vacuum casting for fit and look checks, soft tooling for production
Medical device housings50–1,000Vacuum casting for trials, then injection molding in the final material
Equipment manufacturer spare parts10–200 per yearOn-demand SLS printing — no stock, no tooling
Consumer product launch500–5,000Soft tooling, with 3D printed units to cover early orders

← Swipe to see the full table on mobile

The Hybrid Strategy: Don't Wait for the Mould

You don’t have to pick just one route. Many product teams in India run them in sequence:

  1. Weeks 0–2: ship the first 20–100 units as SLS prints or vacuum castings so sales and feedback start immediately.
  2. Weeks 1–4: build the soft tool in parallel, using feedback from those first units to lock the design.
  3. Week 4 onwards: switch to moulded parts for lower cost per unit as orders grow.

This avoids the two most expensive mistakes in low-volume manufacturing: tooling a design too early, and losing months of sales waiting for a mould.

5 Questions to Decide Your Route

  1. How many parts do you need in the next 12 months? Under 300, start with 3D printing or vacuum casting. Over 500, get a soft-tooling quote.
  2. Must the part be in the exact production plastic? If yes — for certification, chemical resistance or snap-fits — soft tooling is the safest route.
  3. How important is surface finish? For customer-facing parts in small numbers, vacuum casting gives the closest-to-moulded look.
  4. Is the design final? If it may still change, avoid tooling for now.
  5. When do you need the first parts? In days: 3D printing. In 1–2 weeks: vacuum casting. In 3–4 weeks: soft tooling.

Before you commit to a mould, a design-for-manufacturing (DFM) review can cut both tooling and part cost. Our 3D CAD design team can prepare or optimise your model, and our checklist on choosing an injection molding partner in India covers what to ask any supplier.

Frequently Asked Questions

What is considered low-volume manufacturing?

Low-volume manufacturing usually means producing about 50 to 5,000 end-use parts. It sits between prototyping (1–50 parts) and mass production (10,000+ parts) and is often called bridge production because it bridges a validated prototype and full-scale tooling.

Is vacuum casting cheaper than 3D printing?

For a single part, 3D printing is usually cheaper. For 10–100 identical parts that need a smooth, production-like finish, vacuum casting is often better value. Each silicone mould gives around 20 copies, so costs stay fairly flat and it is rarely economical beyond a few hundred parts.

What is soft tooling in injection molding?

Soft tooling is an injection mould made from aluminium or pre-hardened steel instead of fully hardened tool steel. It is faster and cheaper to make, moulds parts in the real production plastic, and suits roughly 500 to 10,000 parts, though it wears out sooner than a hardened steel tool.

At what quantity does injection molding become cheaper than 3D printing?

For a small plastic part, injection molding with a soft tool typically becomes cheaper than SLS 3D printing somewhere around 200–300 units. Larger or more complex parts push that point higher. The exact crossover depends on part size, material and tooling cost.

Can 3D printed parts be used as final products?

Yes. Parts printed in PA12 nylon by SLS or MJF are tough, stable and widely used as end-use components in drones, electronics enclosures, fixtures and spare parts. They are best where quantities are modest or designs change often.

How long does low-volume manufacturing take in India?

Production 3D printing delivers small batches in 2–4 days and a few hundred parts in 1–3 weeks. Vacuum casting takes 7–15 days. Soft-tooling injection molding takes about 2–4 weeks to build the tool, after which parts are produced in days.

Can I switch from 3D printing to injection molding later?

Yes, and it is the most common path. Designs proven with 3D printed or vacuum cast parts can move to injection molding once volumes grow. A DFM review before tooling adds draft angles and uniform walls so the part moulds cleanly.

Not sure which route is cheapest for your part?

Send us your CAD file and quantity. We’ll compare 3D printing, vacuum casting and soft tooling for your part and recommend the most cost-effective option.

Get a 3-Route Quote Call +91 86100 39566

Rapid Prototyping Services in India: Cost, Lead Time & How to Choose

Rapid Prototyping Services in India Cost, Lead Time & How to Choose

Quick answer

Rapid prototyping in India turns a CAD file into a physical, testable part in 1–4 working days for most 3D printed prototypes. Indicative 2026 costs start around ₹3–8 per gram for FDM, ₹8–15 for SLA, ₹10–20 for SLS and ₹50–150 for metal (DMLS). CNC machining takes 3–7 days and vacuum casting 1–2 weeks for small batches of identical copies.

Every good product starts as a prototype. The faster you can hold that first physical part in your hands — test it, break it, improve it — the faster you get to market, and the less you spend fixing mistakes later. That is the whole promise of rapid prototyping: turn a CAD file into a real, testable part in days, not months.

India has become a genuinely strong place to do this. Costs are competitive, turnaround is quick, and the range of processes available has expanded a lot. But “rapid prototyping” covers several different methods, and the right one depends on your part, your budget and your timeline. Here is how to think it through.

Key takeaways

  • 3D printing is the fastest and cheapest route for most early prototypes — often 1–4 days.
  • CNC machining is best when you need tight tolerances in metal or engineering plastics.
  • Vacuum casting is the most cost-effective way to get 10–50 identical copies.
  • The biggest delay is usually waiting for a final CAD file, not the printing itself.
  • Choose a partner with several processes under one roof and a clear path to injection molding.

What Rapid Prototyping Actually Covers

Rapid prototyping is not one technology — it is an approach. The goal is speed, and several processes deliver it:

  • 3D printing (FDM, SLA, SLS) — the fastest, most flexible route for most prototypes. See our 3D printing services.
  • CNC machining — for precise metal and engineering-plastic parts with tight tolerances.
  • Vacuum casting — for producing small batches of identical copies from a single master. Learn how the vacuum casting process works.
  • Metal additive manufacturing — when the prototype itself needs real metal performance. Read our metal 3D printing guide.

A good partner will not push you toward whichever machine they happen to own — they will match the method to what your part actually needs. If you are still deciding between print processes, our FDM vs SLA vs SLS guide breaks them down.

How the Rapid Prototyping Process Works

From file to finished part, most projects follow the same five steps:

  1. Share your design — send a STEP or STL file. No CAD file yet? Our 3D CAD design team can create one from a sketch or sample.
  2. Design review (DFM) — engineers check wall thickness, tolerances and features that could fail or add cost.
  3. Process and material selection — matched to what the prototype must prove: look, fit or function.
  4. Production and finishing — printing, machining or casting, followed by sanding, painting or inserts if needed.
  5. Inspection and delivery — dimensional checks, then dispatch anywhere in India.

How Much Does Rapid Prototyping Cost in India?

Cost depends far more on your part than on a fixed “rate” — volume, geometry, material, finish and quantity all move the number. That said, here is a realistic 2026 picture to budget against:

MethodLead timeIndicative cost (India)Best for
FDM 3D printing1–3 days₹3–8 / gramCheap, fast, larger prototypes
SLA 3D printing1–3 days₹8–15 / gramHigh-detail, smooth display models
SLS 3D printing2–4 days₹10–20 / gramStrong, functional plastic parts
Metal 3D printing (DMLS)5–10 days₹50–150 / gramParts needing real metal performance
CNC machining3–7 daysQuote-based (geometry/material)Precise metal & engineering plastics
Vacuum casting7–15 daysCost-effective for 10–50 copiesSmall batches of identical parts

← Swipe to see the full table on mobile

Prices exclude GST, design and shipping. A few honest pointers to keep costs down:

  • Choose the right process. Do not pay for SLS detail when FDM will do — most first-timers overspend here.
  • Reduce surface area, not just volume. Hollowing parts and thoughtful design cut material cost more than people expect.
  • Batch your parts. Filling a build plate or machining setup spreads the fixed cost across more pieces.

Our complete Cost of 3D Printing in India guide has the full breakdown by material if you want to go deeper.

Which Rapid Prototyping Method Should You Choose?

Start with what the prototype needs to prove:

If you need…ChooseWhy
A quick shape or size checkFDM 3D printingLowest cost, fastest turnaround
A smooth, detailed display modelSLA 3D printingBest surface finish and fine detail
A strong part for functional testingSLS 3D printingTough nylon, no support marks, near-production strength
Tight tolerances in metalCNC machiningHighest precision on metal and engineering plastics
A metal part with complex geometryMetal 3D printing (DMLS)Shapes CNC cannot reach, real metal properties
10–50 identical copiesVacuum castingLow per-part cost without steel tooling

← Swipe to see the full table on mobile

Building a product enclosure? See our custom enclosure 3D printing service. We also prototype for IoT and electronics companies, drone manufacturers and the automotive sector.

Lead Time: How Fast Is “Rapid”?

This is where India shines. For most 3D printed prototypes you are looking at 1–4 working days from approved file to finished part — sometimes same-day for small, simple pieces. CNC parts typically take 3–7 days depending on complexity. Vacuum casting takes a little longer, usually 1–2 weeks, because a master and silicone mould have to be made before copies are cast.

What slows things down? Complex geometry, large size, special materials, heavy post-processing (painting, polishing, inserts) and — honestly — slow file approvals on the client side. The single biggest delay we see is not the printing; it is waiting for a final, print-ready CAD file. Getting your design and CAD sorted up front saves days.

How to Choose a Rapid Prototyping Partner in India

Not all providers are equal. Here is what actually matters when you are picking one:

  1. Range of processes. A shop with only one machine will recommend that machine. Look for FDM, SLA, SLS, CNC and casting under one roof so you get honest advice.
  2. Material options. The right material is half the result — make sure they offer what your part needs.
  3. Tolerances and quality checks. Ask about dimensional accuracy and whether parts are inspected before they ship.
  4. Engineering and DFM support. A partner who flags design issues before printing saves you reprints and money.
  5. Confidentiality. For a new product, an NDA and secure file handling are not optional.
  6. A path to production. The best partners take you from one prototype to a low-volume run to full injection molding without switching vendors. Not sure when to switch? Read 3D printing vs injection molding.

Rapid Prototyping Across India

Precious3D is based in Chennai and ships prototypes across India, including Bangalore, Hyderabad, Mumbai and Coimbatore. Files are reviewed online, so you get the same turnaround wherever you are — only courier time changes.

Frequently Asked Questions

How much does rapid prototyping cost in India?

It depends on the method and your part. As a rough 2026 guide, FDM 3D printing starts around ₹3–8 per gram, SLA around ₹8–15 per gram, SLS around ₹10–20 per gram, and metal DMLS ₹50–150 per gram. CNC machining and vacuum casting are quoted per part based on geometry and material. Volume, finish and quantity all affect the final price.

How long does a rapid prototype take in India?

Most 3D printed prototypes are ready in 1–4 working days, and small simple parts can be same-day. CNC machined parts usually take 3–7 days, while vacuum casting takes 1–2 weeks because a master and silicone mould are made first. Complexity, size, material and post-processing all influence the timeline.

Which is the best rapid prototyping method?

There is no single best method — it depends on the part. 3D printing is the most common and flexible choice for early prototypes, CNC machining suits precise metal and engineering-plastic parts, vacuum casting is ideal for small batches of identical copies, and metal additive manufacturing is used when the prototype needs real metal performance.

Can rapid prototyping be used for production?

Yes. For low volumes, processes like SLS and vacuum casting can produce functional, end-use parts directly. As quantities grow, the usual path is to move from prototyping into injection molding, which becomes more cost-effective at scale. A good partner can guide that transition smoothly.

What file format do I need for rapid prototyping?

STEP files are preferred because they keep exact geometry for design review and CNC machining. STL files work for 3D printing. If you only have a sketch, drawing or physical sample, a CAD designer can create a production-ready model.

Is my design safe when I send it for prototyping?

It should be. Ask your prototyping partner to sign an NDA before you share files, and check how files are stored and who can access them. A reputable partner will offer this without being asked.

The Bottom Line

Rapid prototyping in India in 2026 is fast, affordable and more capable than ever — but the result depends on matching the right process to your part and choosing a partner who will be straight with you. Get those two things right and you will iterate faster and spend less.

Got a design ready?

Send us the file and we will recommend the best process, give you a clear cost and lead time, and get your first part moving.

Get a Prototype Quote Call +91 86100 39566

FDM vs SLA vs SLS: Which 3D Printing Process Is Right for Your Part?

FDM vs SLA vs SLS Which 3D Printing Process

Walk into any conversation about 3D printing and within five minutes someone will start throwing around acronyms — FDM, SLA, SLS — as if everyone is supposed to know them. The truth is, picking the wrong one is one of the most common and most expensive mistakes we see. A part that needed strength gets printed brittle. A detailed miniature comes out covered in layer lines. A simple bracket gets quoted at three times what it should cost.

So let’s strip the jargon. Here is what each process actually does, what it costs in India, and how to pick the right one for your part. If you just want to hand it over, our 3D printing services page covers all three under one roof.

The three processes in one minute

FDM (Fused Deposition Modeling) melts a plastic filament and lays it down layer by layer, a bit like a very precise hot glue gun. It is the technology most people picture when they hear “3D printer.”

SLA (Stereolithography) uses UV light to cure liquid resin into solid plastic. It trades a little speed for stunning detail and smooth surfaces.

SLS (Selective Laser Sintering) uses a laser to fuse fine nylon powder into strong, functional parts — with no support structures needed, because the surrounding powder holds everything in place.

Same goal, three very different routes. The differences matter more than most people expect.

FDM: the budget workhorse

FDM is the cheapest and most accessible process, and for good reason. It handles a wide range of thermoplastics — PLA, ABS, PETG, TPU, nylon, even carbon-fibre-reinforced filaments — and it scales to larger parts without the cost spiralling.

The trade-off is finish and detail. You will see layer lines, and parts are weaker along the layer direction (what engineers call anisotropy). For prototypes, jigs and fixtures, enclosures and functional testing, none of that matters much — which is exactly why FDM dominates everyday prototyping.

SLA: when detail is everything

If your part needs to look finished — smooth surfaces, crisp edges, fine features — SLA is hard to beat. Because it cures liquid resin with light, it captures detail that FDM simply cannot, down to features thinner than a human hair.

The catch: standard resins are more brittle than FDM plastics and can degrade under prolonged UV exposure, and parts need washing and post-curing. A growing range of engineering resins — tough, flexible, heat-resistant, castable and dental-grade — widens what SLA can do, but it is still best thought of as the “looks and detail” process. It shines for display models, jewellery masters, dental and medical models, and detailed scale models.

SLS: strong, functional, no supports

SLS is the quiet favourite among engineers. It sinters nylon powder into parts that are genuinely strong in every direction, with good heat and chemical resistance. Because the powder bed supports the part as it builds, you can print complex geometries, snap-fits, living hinges and interlocking assemblies that would be a nightmare in FDM or SLA.

The surface is slightly grainy and matte rather than glossy, and it costs more than FDM. But for functional end-use parts and low-volume production runs it often works out cheaper overall — there are no support structures to remove, so post-processing is minimal. It is a strong choice for durable IoT and electronic housings.

Side-by-side comparison

 FDMSLASLS
How it worksMelts plastic filament, layer by layerUV light cures liquid resinLaser sinters nylon powder
MaterialsPLA, ABS, PETG, TPU, Nylon, CF blendsStandard, tough, flexible, castable, dental resinsNylon PA12 / PA11, glass-filled nylon
Surface finishVisible layer linesSmooth, high detailSlightly grainy, matte
Detail / resolutionModerateExcellent — the finestGood
StrengthGood; weaker along layersBrittle (standard resin)Strong in every direction
Support removalNeeded; removed manuallyNeeded; wash + UV cureNone — powder self-supports
Cost (India, 2026)₹3–8 / gram (lowest)₹8–15 / gram₹10–20 / gram
Best forPrototypes, large & low-cost partsDetailed & display modelsFunctional end-use parts

So which one should you choose?

Here is the shortcut we give clients:

  • Need it cheap, fast or large? Go FDM.
  • Need it to look beautiful and detailed? Go SLA.
  • Need it strong and functional? Go SLS.

If you need real metal performance, that is a different conversation — see our guide on metal 3D printing in India. And if you are comparing 3D printing against traditional manufacturing for a production run, our 3D printing vs injection molding breakdown will help.

A quick word on cost

Material and process are not the only price drivers — part volume, geometry, finish and quantity all move the number. As a rough 2026 guide in India: FDM starts around ₹3–8 per gram, SLA around ₹8–15 per gram, and SLS around ₹10–20 per gram. The real figure always depends on your specific part, and our complete Cost of 3D Printing in India guide breaks it down properly.

Frequently asked questions

Which 3D printing process is the cheapest?

FDM is the cheapest and most accessible of the three. As a rough 2026 guide in India, FDM starts around ₹3–8 per gram, compared with ₹8–15 per gram for SLA and ₹10–20 per gram for SLS. It also scales well to larger parts without the cost spiralling, which is why FDM dominates everyday prototyping, jigs and fixtures.

Which 3D printing process is the strongest?

SLS produces the strongest, most functional parts. It sinters nylon powder into components that are strong in every direction, with good heat and chemical resistance. Because the powder bed supports the part as it builds, SLS also handles complex geometries, snap-fits and living hinges, making it ideal for functional end-use parts and low-volume production.

Which 3D printing process gives the smoothest finish?

SLA delivers the smoothest surface and the finest detail. Because it cures liquid resin with UV light, it captures features thinner than a human hair with crisp edges and smooth surfaces. That makes SLA the best choice for display models, jewellery masters, dental and medical models, and any part where surface finish sells the product.

Should I use FDM or SLA for prototypes?

Use FDM for fast, low-cost or large functional prototypes where layer lines and minor surface roughness do not matter. Choose SLA when the prototype needs to look finished, with smooth surfaces and fine detail — such as appearance models. In short: FDM for cost and speed, SLA for looks and detail.

The bottom line

There is no single “best” 3D printing process — only the best one for your part. Match the technology to what the part actually has to do, and you will save money and avoid disappointing results.

Not sure which way to go? Send us your design and we will recommend the right process honestly. Talk to our team — our CAD and engineering folks are happy to help.

Metal 3D Printing in India: Cost, Materials & Applications (2026)

Metal 3D Printing in India Cost, Materials & Applications (2026)

For years, 3D printing in India basically meant plastic. Prototypes, jigs, display models, the odd enclosure — all useful, but the moment someone needed a part that could take real load, heat or stress, the conversation went straight back to CNC machining or casting. That has quietly changed. Metal 3D printing has grown up, and in 2026 it is a genuinely practical option for Indian businesses, not just aerospace labs with deep pockets.

If you are weighing it up for your own product, this guide covers what it actually costs in India, which metals you can print, and where it makes sense — and, just as importantly, where it doesn’t. If you are new to additive manufacturing altogether, our 3D printing services page is a good starting point.

What is metal 3D printing, really?

Metal 3D printing — also called metal additive manufacturing (AM) — builds a part layer by layer from fine metal powder instead of carving it out of a solid block. The most common process is DMLS (Direct Metal Laser Sintering), where a high-power laser fuses metal powder inside a sealed, inert-gas chamber. Its close cousin SLM (Selective Laser Melting) works almost identically. You will also hear about Binder Jetting (cheaper, better for volume), EBM (electron beam melting) and DED (directed energy deposition).

The big draw is geometry. You can build internal cooling channels, lattice structures and weight-optimised shapes that are simply impossible to machine or cast. The trade-off is cost — and that is the part most people get wrong.

How much does metal 3D printing cost in India? (2026)

Let’s get to the number everyone wants. Metal AM sits at the premium end of the spectrum. As a rough benchmark, DMLS printing in India runs roughly ₹50 to ₹150 per gram depending on the alloy, with a small functional part typically starting around ₹5,000. Compare that with FDM plastic at ₹3–8 per gram and you can see why metal is reserved for parts that earn it.

Process / MaterialTypical Price (India, 2026)Best suited for
Metal DMLS — Stainless Steel (316L / 17-4 PH)₹50–90 / gramFunctional parts, brackets, tooling
Metal DMLS — Titanium (Ti6Al4V)₹100–150 / gramAerospace, medical implants, lightweight parts
Metal DMLS — Aluminium (AlSi10Mg)₹60–100 / gramHeat sinks, automotive, light housings
Metal Binder JettingLower per-part at volumeMid-to-high volume, complex geometry
FDM Plastic (PLA / ABS) — for reference₹3–8 / gramPrototypes, jigs, display models

A few things move the final price more than the per-gram rate suggests:

  • Part volume and weight — you pay for every gram, plus the support structures.
  • Post-processing — heat treatment, support removal by wire EDM and CNC finishing of mating surfaces are usually mandatory, not optional.
  • Alloy choice — titanium and Inconel cost far more than stainless steel.
  • Quantity — batching several parts onto one build plate brings the per-part cost down.

For a fuller breakdown across every technology, our complete Cost of 3D Printing in India guide lays the numbers out side by side.

Metals you can actually print

The material list has expanded a lot. The workhorses in India right now:

  • Stainless Steel (316L, 17-4 PH) — strong, corrosion-resistant and the most economical way into metal AM. 17-4 PH reaches high tensile strength after heat treatment.
  • Titanium (Ti6Al4V) — an exceptional strength-to-weight ratio and biocompatible, which is why it dominates aerospace and medical implants.
  • Aluminium (AlSi10Mg) — light with good thermal conductivity; popular for automotive parts and heat sinks.
  • Inconel (625, 718) — nickel superalloys that hold up under extreme heat, used in turbines and energy applications.
  • Cobalt Chrome & Tool Steel — dental, medical and hard-wearing tooling.

Picking the right alloy is honestly half the battle. If you are not sure, our CAD design and engineering team can advise based on the load, environment and budget your part has to live with.

Where metal 3D printing makes sense

This is where it earns its keep:

  • Aerospace & defence — lightweight, topology-optimised brackets and ducts.
  • Automotive — performance and motorsport parts, prototype components and conformal-cooled tooling. See our automotive manufacturing work.
  • Medical & dental — patient-specific titanium implants and surgical guides.
  • Tooling & moulds — mould inserts with internal cooling channels that cut cycle times, a neat bridge to our injection molding services.
  • Electronics & IoT — rugged metal housings and heat sinks for demanding IoT and electronic devices.
  • Drones — strong, featherweight structural parts where every gram matters, exactly what drone manufacturers need.

India’s metal AM ecosystem has matured too. Homegrown machine builders like Intech Additive Solutions and Amace Solutions now sit alongside global names such as EOS and 3D Systems, which has steadily pushed costs down and capacity up across the country.

When you should NOT use metal 3D printing

Honest answer: if you need simple geometry in high volume, traditional machining or casting will almost always be cheaper. Metal AM wins on complexity, customisation and low-to-mid volumes — not on churning out 10,000 identical brackets. If you are torn between approaches, our 3D printing vs injection molding comparison is a useful next read.

The bottom line

Metal 3D printing in India in 2026 is no longer experimental — it is a credible production route when your part demands real metal performance and a geometry nothing else can deliver. The key is matching the process and alloy to the job, and staying clear-eyed about volume.

If you have a part in mind, the fastest way to a real number is to send us the CAD file. Talk to our team and we’ll tell you honestly whether metal AM is right for it — and what it will cost.

3D Printing vs Injection Molding: Which Should You Choose?

3D printing vs injection molding

Choosing how to manufacture a plastic part comes down to one question more than any other: how many do you actually need? Get that answer right and the rest of the decision – cost, speed, quality – tends to fall into place. Get it wrong and you either sink money into a mould you never recover, or you pay far too much per part for a process that was only ever meant for prototypes.

Here is the short version. If you need a handful of parts, a working prototype, or your design is still changing, 3D printing is almost always the smarter choice – there is no tooling to pay for and you can hold a finished part within a few days. Once your design is locked and you are ordering in the thousands, injection molding takes over, because the cost of the mould is shared across every part and the price per piece keeps dropping. The interesting decisions live in the middle, and that is what the rest of this guide unpacks.

3D printing vs injection molding at a glance

Factor3D PrintingInjection Molding
Upfront tooling costNoneHigh – a mould must be made first
Cost per partFlat – similar at 10 or 1,000 unitsFalls sharply as volume rises
Best volume range1 to ~1,000 parts~1,000+ (excels at 10,000+)
First part in handAround 1–3 daysAround 4–8 weeks (mould making)
Design changesFree – just edit the fileCostly – may need a reworked or new mould
Material optionsResins, nylon, PETG, metal AM and moreCommodity and engineering-grade plastics
Strength & consistencyGood; MJF nears molded-part strengthExcellent and highly repeatable
Geometry freedomVery high – internal & complex featuresLimited by draft angles and undercuts
Ideal usePrototypes, iteration, low volume, complex one-offsValidated designs made at scale

How the two processes actually work

The two methods sit at opposite ends of manufacturing logic. 3D printing is additive – a machine builds your part layer by layer, straight from a CAD file, with nothing made in advance. Because there is no setup beyond the file itself, the first part and the hundredth part cost roughly the same to produce.

Injection molding is the opposite. A steel or aluminium mould is machined first, then molten plastic is injected into it under pressure, cooled, and ejected – over and over, in seconds per cycle. The mould is expensive and slow to make, but once it exists, each part is astonishingly cheap and identical to the last. The whole economic case for molding rests on producing enough parts to justify that upfront tool.

The cost comparison – the part that decides it

Most teams agonise over materials and finish when the real swing factor is tooling. 3D printing carries no tooling cost at all, so the line on a cost chart starts low and stays fairly flat. Injection molding starts high – you pay for the mould before a single sellable part exists – but the per-part cost then falls as that fixed cost is divided across more and more units.

Why 3D printing stays flat

With printing, you are essentially paying for machine time and material on every part, with no fixed cost to amortise. That is what makes it unbeatable for low volumes and prototypes. For a full breakdown of what drives the number in India, see our complete 3D printing cost guide for India.

Why injection molding gets cheaper at scale

Tooling is the lever. Internationally, a simple aluminium mould can start in the low thousands of dollars and last for a few thousand to perhaps ten thousand parts, while a hardened multi-cavity steel tool can run past USD 100,000 but produce hundreds of thousands – even millions – of parts. Spread across a large run, that cost becomes negligible: per-part pricing can drop to well under a dollar at high volumes. For India-specific tooling and per-unit figures, our injection molding cost guide for India (2026) has the local numbers.

Where the two lines cross

Published cost studies put the break-even point anywhere between roughly 1,000 and 13,000 parts, depending on part size, complexity and how expensive the mould is. One widely cited test by Formlabs produced 1,000 parts for around USD 600 by printing versus roughly USD 3,920 with outsourced molding – about 85% cheaper to print at that volume – with molding only pulling ahead well into the thousands. The lesson is not the exact number; it is that the crossover shifts with your specific part, so the volume bands below are a starting point rather than a rule.

Order volumeLower-cost methodWhy
Under ~200 parts3D printingNo tooling to pay off; full design freedom
~200 – 1,000 partsDependsPart size, complexity and mould cost decide it
~1,000 – 10,000 partsUsually moldingTooling cost starts spreading across enough parts
10,000+ partsInjection moldingPer-part cost drops to a fraction of printing

Lead time and speed to market

Speed often matters as much as cost. A 3D-printed part can be in your hands in roughly one to three days because there is no tooling step – you go straight from file to finished part. Injection molding typically needs around four to eight weeks just to design and cut the mould before the first part appears. If you are racing to a launch, testing a design, or iterating quickly, that gap is decisive. If you have a stable design and a long production horizon, the mould lead time is a one-time cost worth absorbing.

Design flexibility and iteration

This is where printing quietly saves projects. Need to move a mounting boss or thicken a wall? With printing you edit the CAD file and reprint – no extra cost. With molding, almost any geometry change means reworking the tool, and a significant change can mean cutting a new one. That is why so many teams prototype and refine with printing, lock the design, and only then commit to a mould. A clean, manufacturing-ready model makes either path smoother, which is where good 3D CAD design earns its keep.

Material and strength considerations

Both processes cover a wide material range, but they behave differently. Injection molding delivers excellent, highly repeatable mechanical properties – every part comes out essentially the same, which matters for regulated or load-bearing components. Modern printing has closed much of the gap: processes such as Multi Jet Fusion can reach close to the tensile strength of a molded part, which is often more than enough for functional prototypes, jigs, fixtures and low-volume end-use parts.

For very small runs where you still want cast-like quality, vacuum casting can bridge the two – our explainer on the vacuum casting process covers when that makes sense.

When to choose 3D printing

  • You need prototypes or design validation before committing to tooling.
  • Your total volume is under roughly 1,000 parts.
  • The design is still changing or you expect revisions.
  • The geometry is complex, with internal channels or features a mould cannot easily release.
  • You need parts in days, not weeks.

When to choose injection molding

  • Your design is finalised and unlikely to change.
  • You are ordering in the thousands, with more runs to follow.
  • You need every part to be identical, with consistent strength.
  • Per-part cost matters more than upfront investment.

Still weighing low versus high volume? Our guide on low-volume vs high-volume injection molding breaks down where each makes sense.

The smartest route is often both

For most new products, the winning strategy is not choosing one process forever – it is sequencing them. Prototype and refine with 3D printing while the design is fluid, validate the part in real use, then transition to injection molding once your volume justifies the tooling. You de-risk the design before spending on a mould, and you reach scale efficiently. Picking the right manufacturing partner for that handover matters too; our guide on how to choose an injection molding partner in India walks through what to look for.

What to expect in India

India’s 3D printing sector is growing quickly – valued at around USD 860 million in 2025 and projected to reach roughly USD 5.2 billion by 2034, a compound growth rate of about 21% a year, according to IMARC Group. Much of that demand is driven by rapid prototyping in automotive, aerospace and electronics. For you, this maturing ecosystem means competitive pricing on both processes and shorter local lead times than importing parts. Whether you are building drone components, automotive parts or IoT enclosures, both routes are well served domestically.

Frequently asked questions

Is 3D printing cheaper than injection molding?

For small quantities, yes – usually significantly so, because there is no mould to pay for. As volume climbs into the thousands, injection molding becomes cheaper per part and eventually far cheaper. The break-even point depends on your part and tooling cost, but commonly falls somewhere between 1,000 and 13,000 parts.

At what quantity does injection molding become worth it?

As a rule of thumb, once you are confident you will produce more than about 1,000 identical parts – and especially beyond 10,000 – the tooling investment starts paying for itself. Below that, printing usually wins on both cost and speed.

Can 3D printing be used for production parts, not just prototypes?

Yes. For low to mid volumes, complex geometries, or parts where modern printed materials meet the strength requirement, 3D printing is a legitimate production method – not only a prototyping tool.

How much faster is 3D printing than injection molding?

Considerably, for the first parts. Printing can deliver a finished part in one to three days, while molding typically needs four to eight weeks to make the tool before production begins.

Not sure which fits your part?

Every part is different, and the right call depends on your volume, budget, timeline and how finalised your design is. Send us your CAD file and we will give you a free design-for-manufacture review and an honest recommendation – printing, molding, or a staged approach – along with a quote. Get in touch with Precious3D to get started.

How to Choose the Right Injection Molding Partner in India

How to Choose the Right Injection Molding Partner in India

Choosing the right injection molding partner is one of the most critical decisions in your product development journey. Whether you’re a startup building your first prototype or an established company scaling production, the manufacturer you select directly impacts your cost, quality, timelines, and ultimately your market success.

India has rapidly emerged as a global manufacturing hub, offering competitive pricing, skilled engineering talent, and growing infrastructure. However, not all suppliers are created equal — and selecting the wrong partner can lead to delays, poor quality parts, and unexpected costs.

This guide walks you through how to evaluate and choose the right injection molding partner in India – from technical capabilities to hidden red flags.

Why Choosing the Right Partner Matters

Injection molding is not just about producing plastic parts. It involves:

  • Tool design and engineering precision
  • Material selection expertise
  • Process optimization
  • Quality control systems
  • Supply chain reliability

A capable partner acts less like a vendor and more like a manufacturing extension of your team.

Key Factors to Evaluate

1. Technical Expertise & Manufacturing Capabilities

Not all injection molding companies have the same capabilities. Some specialize in high-volume production, while others focus on prototyping or low-volume manufacturing.

Ask:

  • Do they offer Design for Manufacturing (DFM) support?
  • What types of materials do they handle (ABS, PP, Nylon, PC, etc.)?
  • What is their machine tonnage range?
  • Can they handle complex geometries or tight tolerances?

A strong partner will proactively suggest improvements to reduce cost and improve manufacturability — not just execute your design blindly.

2. Tooling Capabilities (In-House vs Outsourced)

Tooling is often the most expensive upfront cost in injection molding. Companies that manage tooling in-house typically offer:

  • Faster turnaround times
  • Better quality control
  • Easier iteration and modifications

If tooling is outsourced, communication gaps can lead to delays and increased costs.

3. Quality Assurance & Certifications

Quality consistency is non-negotiable, especially for industries like medical devices, automotive, or electronics.

Look for:

  • ISO certifications (ISO 9001, ISO 13485 if medical)
  • Defined inspection processes
  • Use of measurement tools (CMM, gauges, etc.)
  • Documented quality control systems

Ask for sample inspection reports before committing.

4. Cost Transparency (Beyond Per-Part Pricing)

Many buyers make the mistake of choosing suppliers based only on the lowest per-unit cost. This often leads to hidden expenses later.

A reliable partner should clearly break down:

5. Turnaround Time & Scalability

Your manufacturing needs may evolve quickly – especially if you’re a startup.

Evaluate:

  • Lead time for tooling
  • Production turnaround
  • Ability to scale from prototypes to mass production

A good partner grows with you.

6. Communication & Responsiveness

This is often overlooked but critical.

You want a partner who:

  • Responds quickly
  • Explains technical details clearly
  • Provides regular updates
  • Is comfortable working with international clients

Poor communication is one of the biggest causes of project failure in manufacturing.

Comparison Table: What to Look For in an Injection Molding Partner

CriteriaIdeal PartnerRed Flag
Tooling CapabilityIn-house toolingFully outsourced tooling
Design SupportProvides DFM feedbackNo design input
Pricing TransparencyDetailed cost breakdownVague or hidden costs
Quality AssuranceISO certified + inspection reportsNo certifications
CommunicationFast, clear, proactiveDelayed or unclear responses
ScalabilityPrototype → mass production capabilityLimited production flexibility
Material ExpertiseWide range of engineering plasticsLimited material knowledge
Lead TimeDefined and realisticFrequent delays

Common Mistakes to Avoid

Choosing the Cheapest Option

Low upfront cost often results in:

  • Poor mold quality
  • Frequent defects
  • Higher long-term costs

Ignoring DFM Feedback

If your partner isn’t suggesting design improvements, you’re likely overpaying or risking part failure.

Not Validating Samples

Always test prototypes or first articles before full production.

Questions You Should Always Ask

Before finalizing a partner, ask:

  • Can you share similar project case studies?
  • What is your mold maintenance policy?
  • How do you handle defects or rework?
  • What is your typical rejection rate?
  • Can you support design optimization?

Why India Is Becoming a Preferred Choice

India offers a compelling mix of:

  • Cost efficiency compared to Western markets
  • Growing ecosystem of skilled engineers
  • Increasing adoption of global quality standards
  • Flexibility for both low-volume and high-volume production

For startups and SMEs especially, India provides a balanced alternative to China in terms of cost, communication, and customization.

Final Thoughts

Choosing the right injection molding partner is not just a procurement decision — it’s a strategic one. The right partner can help you:

  • Reduce costs through better design
  • Improve product quality
  • Accelerate time to market
  • Scale efficiently

Take the time to evaluate thoroughly, ask the right questions, and prioritize long-term value over short-term savings.

Looking for the Right Injection Molding Partner in India?

If you’re planning a project and want expert guidance, consider working with a team that offers:

  • End-to-end support (design → tooling → production)
  • Transparent pricing
  • Fast turnaround times
  • Experience across industries

Get Instant Quote

Getting your design reviewed early can save thousands in production costs.

Injection Molding Cost in India (2026): Tooling, Per Unit & Hidden Costs

Injection Molding Cost in India (2026) Tooling, Per Unit & Hidden Costs

Injection molding is one of the most cost-efficient manufacturing processes in India—but only if you understand the complete cost structure. Many businesses underestimate tooling, ignore hidden costs, or miscalculate per-unit pricing.

This guide breaks down real 2026 costs in India, with comparisons, stats, and practical insights to help you estimate, reduce, and optimize your injection molding budget.


📊 Injection Molding Cost Overview (India vs Global)

Cost TypeIndia (2026)Global AverageKey Insight
Tooling Cost₹80,000 – ₹25,00,000+$1,000 – $100,000+India is 30–60% cheaper
Per Unit Cost₹5 – ₹400+$0.20 – $10Volume reduces cost drastically
Machine Cost₹20L – ₹1Cr+Similar globallyCapex impacts vendor pricing
Lead Time2–8 weeks3–12 weeksFaster turnaround in India

👉 Injection molding services in India is significantly cheaper due to lower labor + operational costs, making it ideal for global outsourcing.


🏭 1. Tooling Cost in India (Biggest Investment)

Tooling (mold) is a one-time cost, but also the largest upfront expense.

💰 Typical Tooling Cost (India)

Mold TypeCost Range
Simple Mold (small part)₹80,000 – ₹1,20,000
Medium Complexity₹1.5L – ₹5L
High Precision / Multi-cavity₹5L – ₹25L+

👉 Example: A basic 250×250 mm mold costs around ₹80K–₹1.2L in India

⚙️ What Drives Tooling Cost?

  • Material (P20 vs H13 steel)
  • Number of cavities
  • Design complexity
  • Surface finish requirements
  • Tool life (low vs high volume production)

📌 Fact: Complex molds globally can exceed $100,000, but India offers much lower alternatives.


🔁 2. Per Unit Cost (Production Cost)

Once tooling is ready, per-unit cost becomes the focus.

💸 Per Part Cost in India

Production VolumeCost per Unit
1,000 units₹50 – ₹400
10,000 units₹10 – ₹80
100,000+ units₹5 – ₹30

👉 Global benchmarks show $0.20–$10 per part depending on volume

📉 Key Insight

  • Higher volume = lower cost per unit
  • Tooling cost gets distributed across production

📌 Example:
A ₹2L mold + ₹20/unit production becomes ₹40/unit at low volume, but drops below ₹10 at scale.


⚖️ Tooling vs Per Unit Cost (Critical Comparison)

FactorTooling CostPer Unit Cost
TypeOne-timeRecurring
ImpactHigh upfrontLong-term
Best forMass productionAll volumes
OptimizationDesign & materialVolume & cycle time

👉 Smart strategy:

  • Low volume → reduce tooling cost
  • High volume → optimize per-unit cost

⚠️ 3. Hidden Costs Most Buyers Ignore

This is where most budgets go wrong.

🚨 Hidden Cost Breakdown

Cost TypeEstimated Impact
Design & CAD10–15%
Material wastage5–10%
Setup & labor5–8%
Finishing / polishing5–20%
Packaging₹2–₹20 per unit
Maintenance of moldLong-term cost

👉 Design + manufacturing alone can account for 30–50% of mold cost


🧠 4. Cost Calculation Formula (Simple)

Total Cost = Tooling Cost + (Per Unit Cost × Quantity)

Example:

  • Tooling = ₹2,00,000
  • Per unit = ₹20
  • Quantity = 50,000

👉 Total = ₹2,00,000 + ₹10,00,000 = ₹12,00,000

👉 Effective cost per unit = ₹24


📈 5. Real Industry Insights (India 2026)

  • India’s plastic molding demand is growing due to automotive, packaging, and electronics sectors
  • Multi-cavity molds reduce cost per part significantly
  • India offers 30–60% lower manufacturing cost vs US/EU
  • Faster lead times = better for startups & MVP production

🔍 People Also Search For (SEO Boost Section)

  • Injection molding cost per kg in India
  • Plastic mold cost calculator India
  • Injection molding vs 3D printing cost
  • Minimum order quantity for injection molding
  • Prototype vs production mold cost

🆚 Injection Molding vs 3D Printing (Cost Comparison)

FactorInjection Molding3D Printing
Setup CostHighLow
Per Unit CostVery low (bulk)High
Best ForMass productionPrototyping
SpeedFast after setupImmediate
ScalabilityExcellentLimited

👉 Insight:

  • Use 3D printing for testing
  • Switch to injection molding for scale

🎯 How to Reduce Injection Molding Cost

  • Simplify part design
  • Use standard materials (PP, ABS)
  • Increase production volume
  • Choose multi-cavity molds
  • Optimize cycle time

🚀 Final Thoughts (Lead Angle)

Injection molding in India is highly cost-effective, but only when you balance:

👉 Tooling investment
👉 Per-unit pricing
👉 Hidden costs

If you’re planning production, the smartest move is to:

✔ Get a DFM (Design for Manufacturing) analysis
✔ Compare multiple vendors
✔ Start with prototype tooling

Sustainable Manufacturing: Is 3D Printing the Future?

You see the word “sustainability” everywhere now. But when you look deeper, most manufacturers still run on old systems that burn energy, create waste, and lock teams into slow processes. If you’ve worked in product development or supply chain, you know how quickly waste adds up. You produce extra stock “just in case.” You store parts you never use. You ship items across the world only to rework them again.

3D printing changes that. It gives you control over how you design, test, and manufacture without the usual waste. It’s not a magic fix, but it solves real problems that slow companies down. And that’s why many people ask the same question: Is 3D printing the future of sustainable manufacturing? Here’s what we know.

Why Sustainability Matters in Today’s Manufacturing

By 2024, manufacturing accounted for around 20% of global CO₂ emissions (Source: IEA). Governments in the US, Europe, and India pressured industries to reduce carbon waste and use cleaner methods. If you work in or around operations, you already feel this pressure. Regulations tighten. Customers expect cleaner products. Teams need faster ways to design and produce parts with less waste.

Sustainable manufacturing isn’t an option anymore. It’s a requirement.

Where 3D Printing Fits into Sustainability

3D printing is simple at its core. You print only what you need, when you need it. No extra inventory. No cutting raw materials into shapes and throwing the rest away. No giant molds that take weeks to build.

Here’s what this procedure means for real teams:

  • You reduce material waste by up to 70% compared to machining.
  • You run production without molds, which cuts tool waste almost entirely.
  • You build parts near the end user, lowering shipping emissions.
  • You test ideas in hours instead of weeks.

The biggest gain is flexibility. You don’t lock yourself into large production runs. You print only what you need.

Quick Comparison: Traditional vs 3D Printing

FactorTraditional Manufacturing3D Printing
Material WasteHighLow
Energy UseHigh for machining and moldingLower for small and medium runs
SpeedSlow for prototypesFast
InventoryNeeds storagePrint on demand
ToolingMolds and dies requiredNo tooling

If you want to compare production costs, check our 3D printing pricing guide.

What Experts Say

“Companies that cut waste at the design stage see the biggest sustainability gains. 3D printing puts design and manufacturing closer together.” — Dr. Elena Brooks, Materials Researcher (2025)

“Localized micro-manufacturing reduces emissions faster than any other shift we’ve tracked.” — Global Supply Chain Index, 2024 Report

How 3D Printing Supports Sustainable Workflows

You lower waste not only by printing less material but also by improving how you design products. When engineers have freedom to test ideas quickly, they avoid late-stage fixes that cost energy, materials, and time. You stop building parts that fail later. You stop shipping prototypes back and forth. You move fast and clean.

Where Companies Already Use It

  • Consumer electronics
  • Healthcare devices
  • Automotive lightweight parts
  • Aerospace brackets and ducting
  • Architecture and industrial tooling

If you want real-world examples you can study, check these:

Does This Make 3D Printing the Future?

For many applications, yes. You gain speed, control, and cleaner workflows. You design smarter from day one. You print only what you need. You avoid the waste you see in traditional plants. Large-scale mass production will still use molding and machining, but the most flexible and sustainable workflows now lean heavily on 3D printing.

If you want sustainable manufacturing that actually works in real teams, 3D printing is already part of the future. It’s not coming later. It’s here now.

FAQs

1. Is 3D printing actually eco-friendly?

Yes. You reduce waste and avoid tooling. That makes the process cleaner.

2. Can 3D printing replace traditional manufacturing?

Not fully. But it takes over prototyping and low-volume production.

3. Which materials are the most sustainable?

PLA, recycled PETG, and some bio-based polymers perform well.

4. Does 3D printing use a lot of electricity?

Not compared to CNC or injection molding setup processes.

5. Are 3D printed parts safe for long-term use?

Yes, if you pick the right material and design the part for its load.

6. Can companies scale with 3D printing?

Yes. Many run hybrid setups: 3D printing services for prototypes and molds for mass runs.

How Much Does Low-Volume Injection Moulding Cost in the UK?

You want to know how much low-volume injection moulding costs in the UK. The answers online jump around. Some mention “cheap tooling,” others talk about “rapid moulds,” and none of it gives you a real number. So let’s make this simple and direct. This guide explains what you actually pay, why the cost changes, and what you should expect in 2026.

What “Low-Volume” Really Means in the UK

Low-volume injection moulding usually means runs between 100 and 10,000 parts. It’s the middle ground between rapid prototyping and mass production. You choose this when you want real production-grade plastic parts without spending £20,000+ on full steel tooling.

Most UK manufacturers now use aluminium tooling for low-volume batches because it cuts machining time. That drops cost and speeds up production.

Average Low-Volume Injection Moulding Cost in the UK

You pay two things: tooling cost and per-part cost. Here’s the breakdown:

Cost TypeTypical Price (UK)Notes
Tooling Cost£1,200 – £6,500Aluminium tools; simple parts start lower
Per-Part Cost£0.80 – £6Material, cycle time, part size matter
Total Cost for 1,000 Parts£2,500 – £9,000Based on simple ABS or PP components

Most small UK companies spend between £3,000 and £12,000 for a complete low-volume project.

What Drives the Cost

Several factors change your budget. You control many of them.

1. Tooling Material

Aluminium tools cost less and suit batches under 10,000 units. Steel tools last longer but cost more. If you only need proof-of-concept products or early production, aluminium saves money.

2. Part Geometry

Sharp corners, deep ribs, thin walls, threads, and undercuts increase machining time. When possible, simplify the geometry. You save on tooling and shorten lead times.

3. Material Choice

Common materials like ABS and PP cost less. Engineering plastics such as Nylon, PC, and PEEK raise the per-part cost because they need higher mould temperatures and longer cycle times.

4. Batch Size

Larger batches lower per-part cost. You pay the tooling fee once, so more parts stretch its value.

5. Finishing

Texturing, painting, coating, inserts, and ultrasonic welding increase cost. Keep finishes minimal if you want a lower price.

2026 Market Trends Affecting UK Moulding Prices

Several UK manufacturing reports point to rising energy costs, higher hourly labour rates, and improved automation. These shift pricing in predictable ways:

  • Energy cost increased production rates by about 3–7% across UK plastics facilities in 2024.
  • Automation adoption grew 20% in 2025, which lowered cycle-time costs for simple parts.
  • Tooling imports from Europe dropped because UK shops now supply aluminium tools with shorter lead times.

These trends push low-volume moulding prices slightly higher than pre-2023 levels, but turnaround is faster and tooling is more reliable.

Expert Opinions

“Low-volume moulding makes sense when you want real parts fast without locking money into full steel tooling.” — UK Product Engineer, 2024

“The biggest savings come from simplifying the geometry. One design change can cut tooling costs in half.” — Injection Mould Toolmaker, 2025

Is Low-Volume Injection Moulding Cheaper Than 3D Printing?

Up to 40 parts, 3D printing can be a winner. But post that, the low-volume injection molds we make make the per-unit cost the same as the 3D print cost. Injection molded parts have superior strength and finish, so it’s a clear winner. But after that, injection moulding drops the per-unit cost fast. At around 300–500 parts, moulding becomes significantly cheaper.

Injection Moulding FAQs

Q: Is low-volume moulding worth it for startups?

Yes. You get production-quality parts without large investment. You also test the market faster.

Q: How long does tooling take?

Most UK toolmakers take 2-4 weeks for aluminium moulds.

Q: Why does one supplier quote £1,500 and another £6,000?

Tool design, machining hours, and finishing vary. Always compare tool lifetime and maintenance.

Q: Can I get colour-matched parts?

Yes. Colour matching adds a small fee, usually £30–£70 per batch.

Q: What is the cheapest way to lower cost?

Simplify the part. Remove undercuts. Avoid unnecessary textures.

When Low-Volume Moulding Makes Sense

You should pick low-volume moulding when you want:

  • real production-quality parts
  • a reasonable up-front cost
  • faster turnaround than traditional tooling
  • units ready for market testing

It’s the right option when you know the design is stable and you plan to scale later. You can upgrade to steel tooling after you confirm demand.

Conclusion

Low-volume injection moulding in the UK usually costs between £3,000 and £12,000 for complete production. You pay for tooling, per-part cost, and finishing. Keep the part simple, choose common materials, and pick aluminium tooling to control your budget.

If you plan this early, you avoid overruns and get your parts ready sooner.

For deeper reading: